Media Content: Finding and Uploading Content, and Enhancing Images
Finding Content
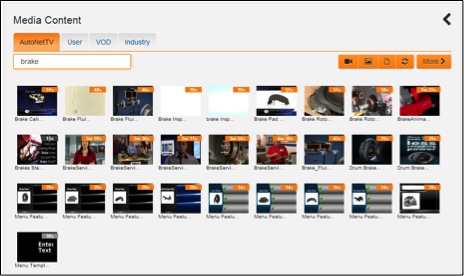
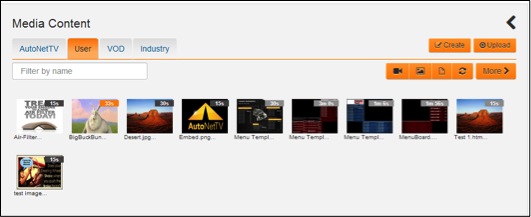
In the Media Content section, you’ll see the four tabs – AutoNetTV, User, VOD and Industry. Under each tab you’ll see an input box for you to “Filter by name”. Simply begin typing any word, such as “brake”, and you’ll see the system automatically begins filtering for any asset (video, image, etc) that has the word “brake” in the name.
Each asset in the system automatically displays the run-time, or how long that asset is set to play on screen. For videos, this runtime is fixed and is shown in orange in the top right corner of the thumbnail. For images, the default is 15 seconds, which can be edited when inserted into your program, and is shown in gray in the top right corner of the thumbnail. Placing your cursor over any asset will display its full name.

There are five orange buttons to the right of the filter input box. These give you quick filter options, such as only seeing Videos, Images, or Customizable Content (custom content created by you, or content created by AutoNetTV and available for editing by you). You can click the More button to apply even more filters to the content you’re trying to find (such as Brand, Product type, etc.). The button with two arrows forming a circle to clears all applied filters.
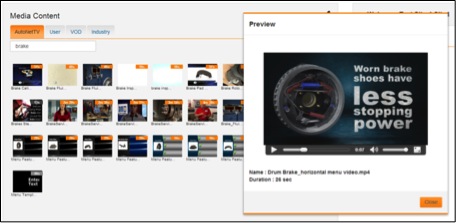
For Videos, double-click on any asset you find in the system to open a larger Preview window. You can also click on the square icon in the lower right corner of the preview window to open a full-screen preview window (shown below).
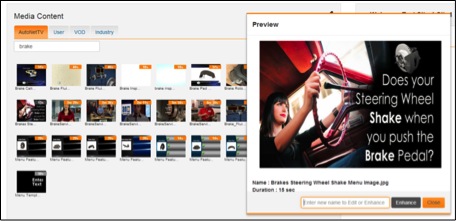
For Images, double-click to open a larger view of the asset.
Notice the Enhance button on the bottom of the image preview window. In order to use this tool, type in a new name in the text input line, and then click Enhance.
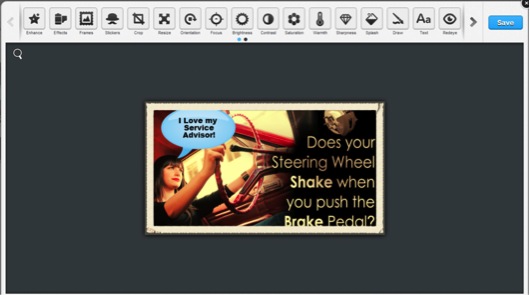
Editing and Enhancing Images
When you click to Enhance an image, you'll open the image editor (shown below).
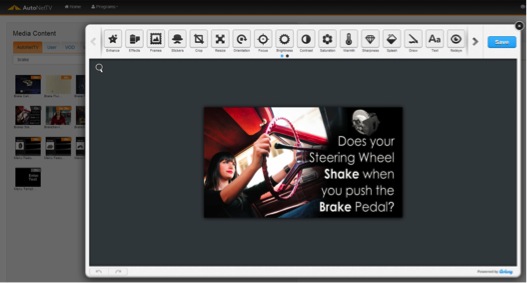
You can click on any of the dozens of image enhancement tools available. Click the right arrow next to the Save button to scroll to even more functions than currently displayed. For any enhancements, you have the option of saving them or cancelling and returning to this main editing screen. Each enhancement you Apply to the image will be saved, and you can then continue to make more enhancements. For example, you can change the effects, then add a sticker, and then add your own text. All of this can be added to the same image. These changes will NOT affect the original image in the AutoNetTV Drive system – the original image will still be located in its original location in the Media Content library. Click the X in the right corner to exit the Image Enhancement tool.
Once you Save your enhanced image, you will then see it under the User tab in the Media Content library. (NOTE: It may take a few minutes for an automatic thumbnail to be generated).
User Content
Click on the User tab to see any/all content you have uploaded or edited and saved.
The User tab shows any/all assets you’ve uploaded into the AutoNetTV Drive system from your own computer. Once you’ve uploaded an asset, you have options for changing the item based on the asset type.
User Videos
- You can edit the name of a video after you’ve uploaded it to the system.
- You can replace a video with another video or file from your computer. This is helpful if an asset has already been added into a program (such as driveExperience:Lobby TV) and you want to replace it with something new without finding and deleting it from your playlist. This is great for coupons or promotions that you want to keep running in your program, but a new promotion or program has just started with a new expiration period. When you click Replace, simply find the new video on your computer and begin the upload.
- You can enable VOD for a video. This means that video will be available for you to show a customer or employee, instantly on your TV or Menu device, by using the included remote control.
User Images
- You can edit the Name of an image after you’ve uploaded it to the system.
- You can replace an image with another video or file from your computer (as discussed above).
- You can enhance the image as previously shown.
Uploading Content
In the top right corner of the User Media Content tab, you’ll notice two buttons – Create and Upload. In this section, we’ll discuss Uploading Content (to learn how to Create Customizable Content, please see related Help section).
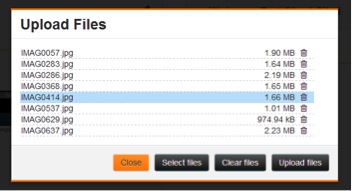
Upload
Clicking this button allows you to select one or more files from your computer to upload into your User content tab. If you select many files to upload, you can still remove files from the upload process before you begin by clicking on the garbage icon next to the file size for that asset. When you’re ready, click Upload Files.
Most video and image file types are accepted. For videos, this includes mp4, mov, wmv, avi, and other popular file types. The AutoNetTV Drive system will automatically encode these different types into one common format and make sure the sound is consistent for all content (e.g. super loud videos will have their audio levels automatically lowered so you don’t have to keep adjusting the volume on the TV). Most image types are also accepted, such as jpg, png, gif, etc.