Customizable Content: Creating and Editing for Menu Board
The AutoNetTV Drive system allows you to create your own content (in the User tab, discussed below) and edit content templates created for you by AutoNetTV.
To see and edit Content Templates from AutoNetTV, click on the AutoNetTV tab, and choose the Filter by Customizable Content button. You can double-click to preview any template, and type in the Filter input line to search by name.
To edit a Template, double-click to open the preview, and then click Copy and Edit. Once you’re done making any changes, click the arrow next to Save and choose Save As. This will save a new version of the edited template in your User tab, while keeping the original asset in the AutoNetTV tab. See instructions further below for editing.

User Content: Edit and Create
Click on the User tab to see any/all content you have uploaded or edited and saved.
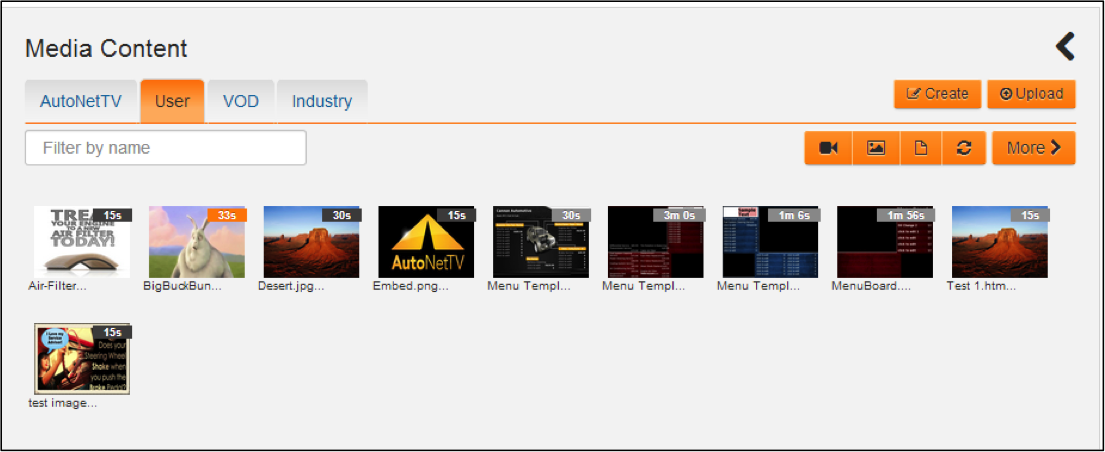
The User tab shows any/all assets you’ve uploaded into the AutoNetTV Drive system from your own computer. Once you’ve uploaded an asset, you have options for changing the item based on the asset type.
User Videos
- You can edit the name of a video after you’ve uploaded it to the system.
- You can replace a video with another video or file from your computer. This is helpful for when an asset has already been added into a program and you want to replace it with something new without finding and deleting it from your playlist. This is great for coupons or promotions that you want to keep running in your program, but a new promotion or program has just started with a new expiration period. When you click Replace, simply find the new video on your computer and begin the upload.
- You can enable VOD for a video. This means that video will be available for you to show a customer or employee, instantly on your TV or menu device, by using the included remote control.
User Images
- You can edit the name of an image after you've uploaded it to the system.
- You can replace an image with another image or file from your computer (as discussed above).
- You can enhance the image (as discussed in "Media Content: Finding and Uploading Content, and Enhancing Images").
Uploading and Creating Content
In the top right corner of the User Media Content tab, you’ll notice two buttons: Create and Upload.
Upload
Clicking this button allows you to select one or more files from your computer to upload into your User content tab. If you select many files to upload, you can still remove files from the upload process before you begin by clicking on the garbage icon next to the file size for that asset. When you’re ready, click Upload Files.
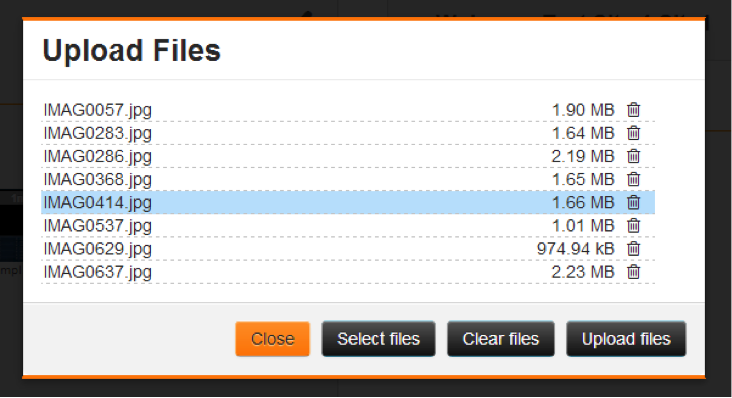
Most video and image file types are accepted. For videos, this includes mp4, mov, wmv, avi, and other popular file types. The AutoNetTV Drive system will automatically encode these different types into one common format and make sure the sound is consistent for all content (e.g. super loud videos will have their audio levels automatically lowered so you don’t have to keep adjusting the volume on the TV). Most image types are also accepted, such as jpg, png, gif, etc.
Create
The AutoNetTV Drive system not only gives you tons of content, and tons of options for editing content, but also the ability to Create your own content. This newly created content is saved as HTML5 (a universal web programming language), and allows you to insert images, videos, slideshows, text, menus, and more into a complete output file for display on your Menu Board or Tablet subscription product.
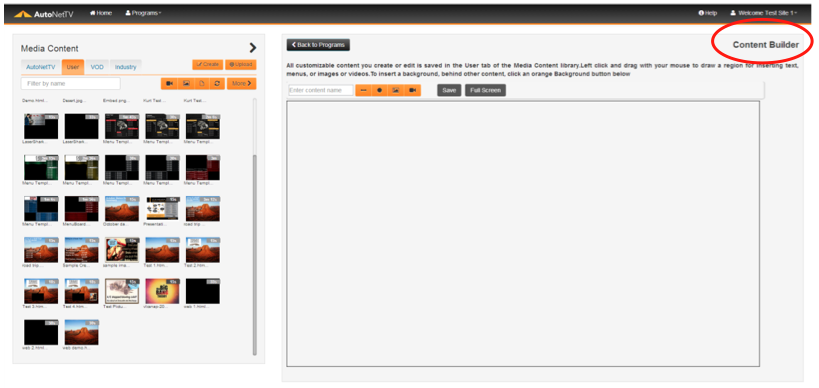
You'll notice the following items in the Content Builder:
- "Back to Programs" button: This closes the Content Builder.
- An input field to give the new content a name.
- Four buttons to:
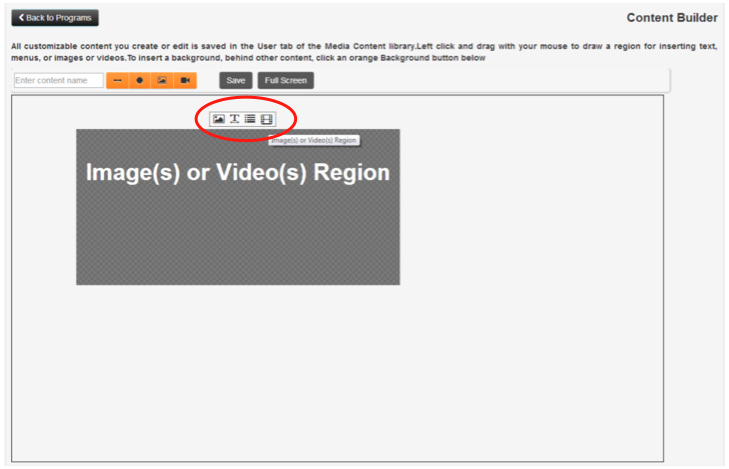
- Change the aspect ratio (default is set to 16:9 – the layout for widescreen displays, such as LCD).
- Add a Background Color. You can then add items on top of this color.
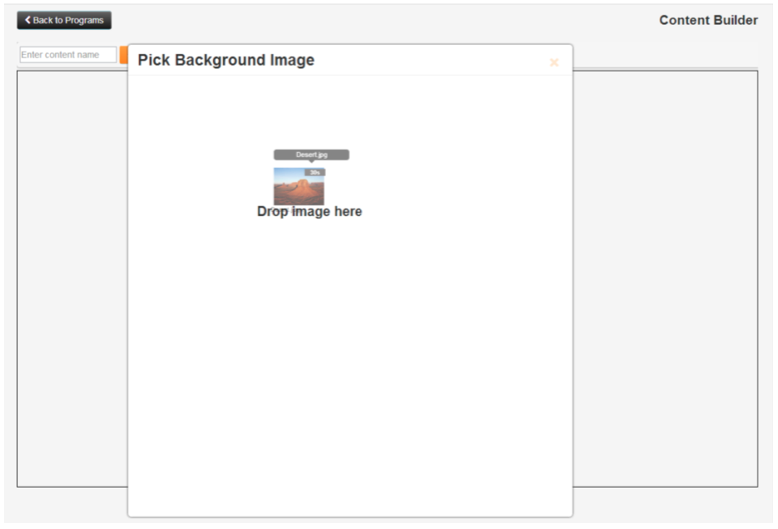
- Add a Background Image. You can then add items on top of this image.
- Add a Background Video. You can then add items on top of this video.
- Save: If you’re editing something you’ve already created, a "Save As" option will appear.
- Full Screen: If you drag to create a region for new content, you also have the option of clicking the Full Screen button – which will make that new content region fill the entire screen, without you having to drag and match all the corners to the screen size. Once an item is made Full Screen, you can undo this by clicking the Exit button that is now located where the Full Screen button was.
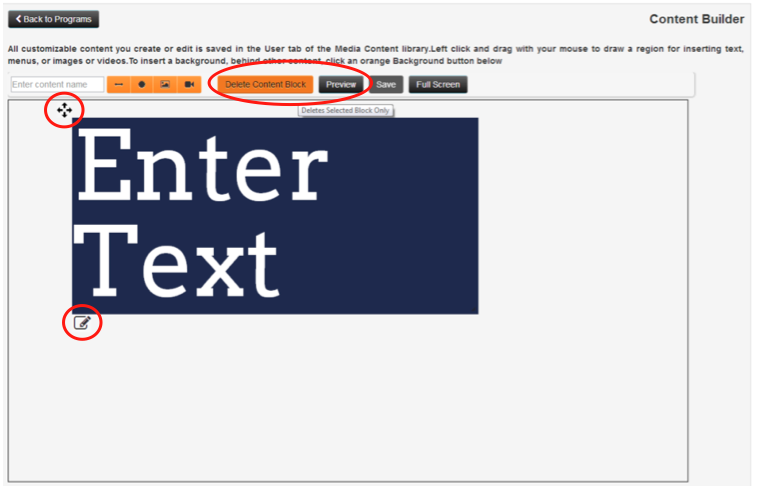
To create a new content region, just click and hold your Left mouse button and drag it to any size you desire. Whenever your mouse is placed over the canvas, the cursor will change to a crosshair. Once you let go of your left mouse button, you’ll see four options for choosing the region type based on the type of content you wish to add. The options are:
- Website Media Region: Disregard this option. It’s part of the system code used for generating Content Blocks for the driveContent: Website Content program.
- Fill Text Region: Whatever text you type will automatically resize to fill the entire block.
- Menu Region: Creates a block for menu items and pricing (tied together on the same line).
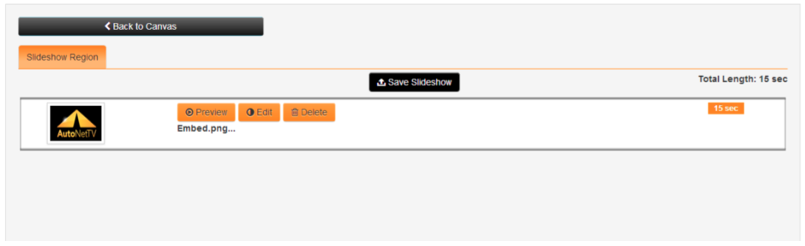
- Slideshow Region: Allows for one or more videos or images to be inserted into the block.
Once you've selected the type of region you wish to edit, you'll see a new series of buttons and options in the content builder screen. They are:
- Delete Content Block: This will remove the selected region of content from the Content Builder. To select any region or block, click on the crosshairs, usually located in its top left corner.
- Preview: Allows you to see what the content will look like on screen. The background is white by default unless you choose a different color, image, or video.
- Crosshairs: To move or select a region block.
- Advance Settings: Allows you to edit numerous items for the selected region or block of content.
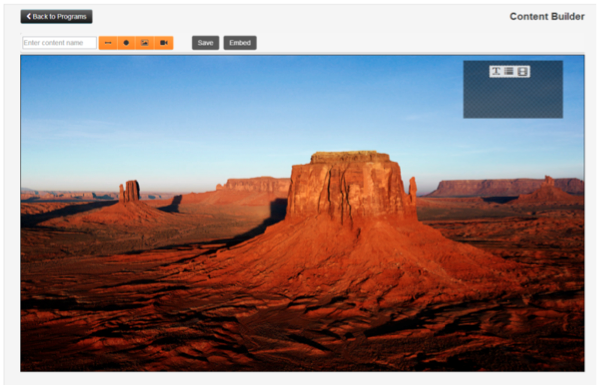
For this example, I've clicked the button to add a background image. Simply drag the image you want from the left (Media Library) onto the canvas.
This is the object with the background image inserted.
Slideshow Region Example
To insert video(s) or image(s) assets into this region, simply double-click on the block to open the Slideshow Region. As with other aspects of the AutoNetTV Drive system, simply drag and drop any assets from the left Media Content library into the right side of the screen. Click Save Slideshow when you are finished.
Fill Text Region Example
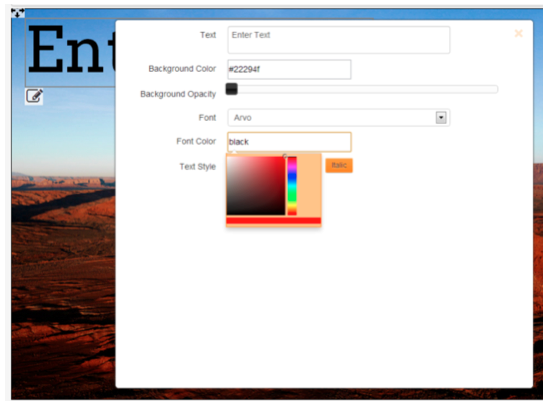
Draw a region and select the appropriate option. Click on the Advanced SEttings button to make edits.

Type your text, and edit the settings you wish. Sliding the Background Opacity all the way to the left removes any color in the background so it is clear. Type your text color by name, or select a color from the palette.
You can move any region after it has been created by clicking on, and moving the arrow crosshairs. If you don’t want to keep a region you’ve created, just click on the delete button above the Content Builder canvas.
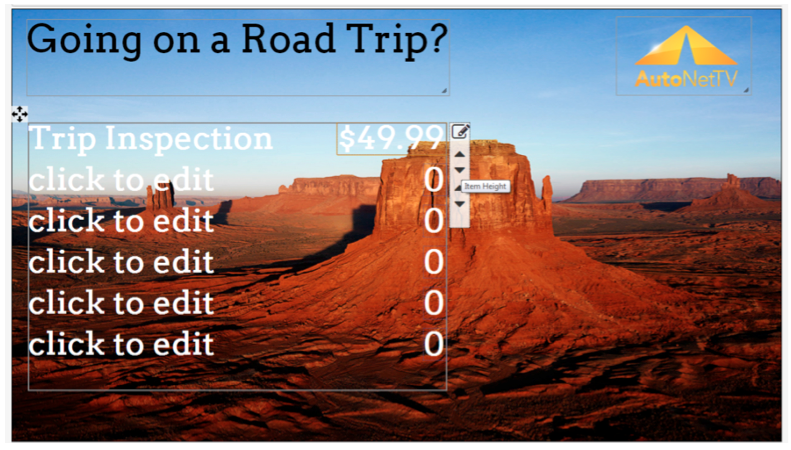
Menu Region Example
Draw a region and select the appropriate option. You’ll again find Advance Settings options, and you’ll also see two sets of up/down arrows. These allow you to automatically the Height and Spacing between the menu items. This helps to more precisely adjust sizing and spacing between each menu line item.
TIP: For quick editing, press Ctrl+A on your keyboard to select all the text in a line, and then type your description to overwrite what is already there. Also, to move from the item to the pricing section, simply press Tab on your keyboard.
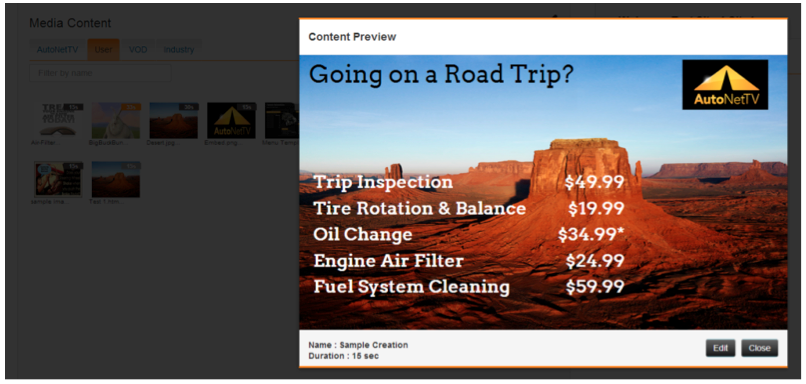
Save your work. You’ll now find what you created in the User tab of the Media Content library. You can now insert this content into any of your subscription products. You can click to Preview the creation or make further Edits to it.
Similar steps followed to create content can also be followed to edit existing AutoNetTV templates. However the AutoNetTV templates generally have content regions that have been locked – meaning you can only edit the elements within those regions, but cannot move or delete the region. To edit these, simply click on any region and begin editing as shown above. Even though some regions are locked, the entire template is not locked. This allows you to insert new regions, change the background image or video, etc.