Editing Your Website with driveContent
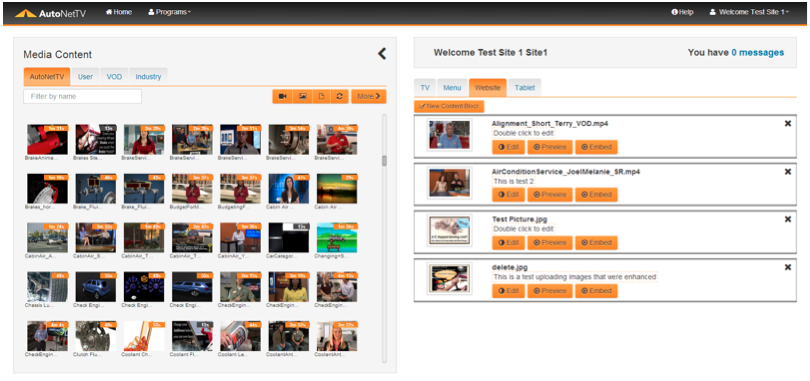
To start editing your Website program, click on the Website tab in the subscription section of the Home Screen (right side of the screen), or click on the Programs drop down link in the top left area of the AutoNetTV Drive system and select Website.
Note: As discussed below, your webmaster, or whoever manages and edits your website, will need to copy the web code into your website once. After that, you may edit the asset (video, image, etc) that displays through that code on your website as many times as you wish through the AutoNetTV Drive system without having to change anything on your website. If an asset displayed on your website is replaced by the asset owner in AutoNetTV Drive (you, a corporate account, or industry manufacturer, etc), the asset displayed on your website will automatically update.
Similar to the TV and Menu Board programs, the assets added to your website content subscription will be listed in the right side of the screen. However, as opposed to TV and Menu, the order of the assets shown (as seen below) in the website program does not mean or affect anything. Instead, these are simply the assets you’ve chosen to insert onto your website. For example, the first asset shown may be on your About Us page, while the last asset shown may be inserted on your Homepage. The order is of no importance. And, you can insert the same asset into several different places on your website if you wish.
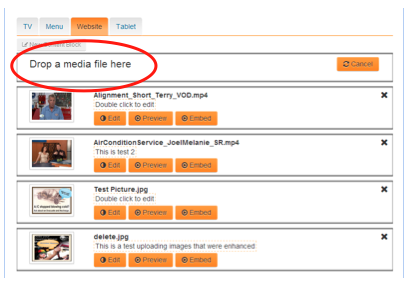
Locate the New Content Block button and click it to insert new content for your website. A Content Block refers to the placeholder, with its associated web code, that contains an asset for display on your website. You’ll need a unique Content Block for each unique asset (video, image, etc) that you wish to display on your website. The Content Block is similar to a window that displays content from the AutoNetTV Drive servers on your website. The web code determines the size of the window, and the asset shown. You or your webmaster determine where the window is placed on your website.
Once you’ve clicked New Content Block, you’ll see a new block in the Website program section prompting you to “Drop a media file here” in the block.
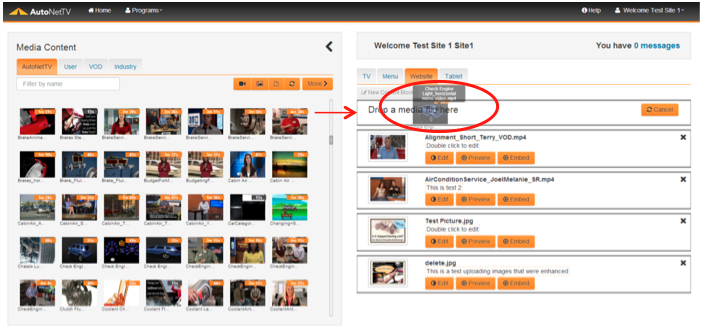
You can find any asset in the Media Content library on the left, and then drag and drop it into the content block on the right. Just hold the left mouse button on an asset, and move it into the section on the right.
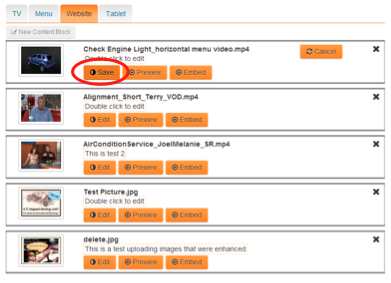
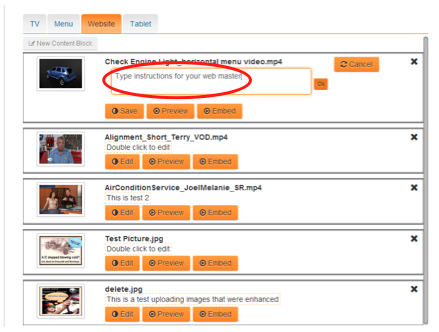
You must click the Save button for this asset to be added into the content block. Or, you can click Cancel to go back to the option of selecting a different asset.
As with all other programs in AutoNetTV Drive, you can click to Preview an item in the list of assets.
Once an asset is inserted, you can double click on the area above the orange buttons to type a note (abeled “Double click to edit”). This is especially helpful to give instructions to your webmaster, or as a reminder to you, for things such as where on your website you want the content block to be placed. Click the OK button to save the note.
Now you need to get the Embed Code (the web code required to insert the block of content into your website). Any time you add a new Content Block in the Website content program, you’ll need to insert that block’s web code into your website. Creating and editing a content block is only the first step; the final step is to insert the code in your website programming.
When you click Embed Code, you’ll notice several size options available. This determines the size for which the content will appear on your website. You must pick the size for each content block.
NOTE: If you change the size of a content block AFTER the code has been inserted into your website, then you or your webmaster will need to change that web code with the new code for the new size. The web code contains fixed sizes for the content display – so anytime you change it in AutoNetTV Drive, new code will be generated to be inserted in your website.
In addition to several fixed sizes, you have the option to type a custom size. Simply enter the width number and click the Submit button. This will automatically generate a 16x9 ratio (typical wide screen display) code. You or your webmaster may click the Copy to Clipboard button to copy the code for placement on your website. You can also highlight the code itself in the window and press "Ctrl+C" on your keyboard or right click and select Copy from the menu.

If you wisj to delete an entire block of content, just click the X in the top right corner.

Be aware: If you have already placed the web code on your website, you will now have an area of blank content. If you want to keep the block of content, but want to change the video or image that appears on your website, then click to edit or replace the asset instead. If you delete a complete content block, and you’ve already inserted the code on your website, be sure to remove the code from your web programming.
As discussed above, the owner of any asset uploaded into the AutoNetTV Drive system has the option to replace an existing asset. For example, XYZ manufacturer uploads a coupon for a 10% rebate. You insert this coupon into a content block, and then into your website. XYZ can replace the coupon with the current promo of 15% rebate. Once this is done, the coupon displayed on your website will automatically update to the 15% rebate coupon. This is true of any content replaced by its owner, including any content you upload to your User tab.
Content Restriction
You can insert as many images and videos into your Website program as you wish. However, you cannot insert any Customizable content or templates (used for the Menu Board program) into the Website program. This is an intentional restriction to help prevent you from accidentally inserting “Duplicate Content” on your website. Duplicate content is when the same text is copied several places on the same website, and is something for which Google and other search engines will penalize your website. In order to help protect you, we’ve eliminated the ability for you to add text in the content blocks by eliminating the ability to add customizable content.
However there’s still a way to add custom text. You can do this by "enhancing" an image from the Media Library. You’ll notice an Enhance button on the bottom of the Image Preview window. In order to use this tool, type in a new name in the text input field and then click Enhance (full instructions are in "Media Content: Finding and Uploading Content and Enhancing Images").

Insert text in an image and save it to your User tab of content. Then, insert this text enhanced image into a content block.