Editing Your Menu Device
To start editing your Menu Board program, click on the Menu tab in the subscription section of the Home Screen (right side of the screen), or click on the Programs drop down link in the top left area of the AutoNetTV Drive system and select Menu.
Once you see your Menu device(s), you can click Preview to see what the program will look like on your screen. You can also click the left and right orange arrows to go back or forward to the previous or next item in the playlist. Below is what your screen will look like once you first receive and connect your device.
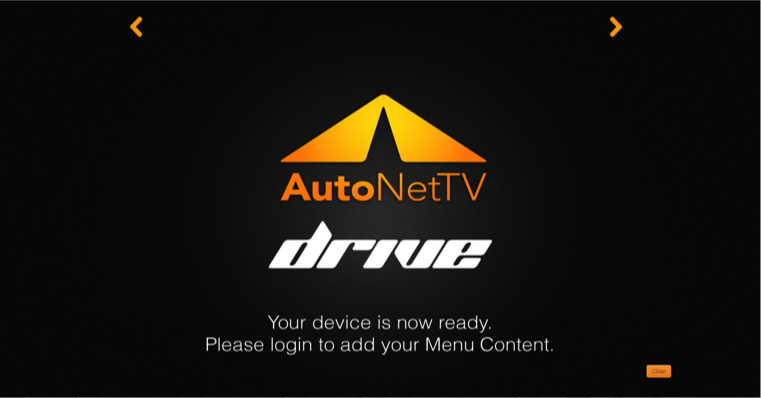
Click the Manage Program button to begin editing your Menu Board. You’ll see the image shown above as the only asset in your playlist.
You can find any asset in the Media Content library on the left, and then drag and drop it into the playlist on the right. You can then re-order any assets by simply clicking on an item and moving it up and down in the playlist area.
Next to any asset in your playlist, you’ll see the following button options:
- Preview: Allows you to immediately see a preview of the asset, not the entire playlist.
- Settings: Allows you to change variables about this individual asset.
- Duration (images only): This is how long the asset will appear on screen. The default time for images is 15 seconds. You can change this to any amount of time you wish.
- Order: In addition to being able to drag items up/down within the playlist, you also have the option to specify order number. This is helpful for playlists with many assets that go beyond the viewable screen.
- Start Date: You can specify a date in the future for an asset to begin playing in the program, in its current position or order. This is ideal for promotions, seasonal services, etc.
- End Date: You can also specify an End Date for an asset to stop playing in the program. (NOTE: you do not need an End Date if you have a Start Date.)
- Delete: Removes an asset from the playlist, but does not remove an asset from the content library.
Adding Content
Click Delete to remove the default AutoNetTV image asset from the playlist.
Remember that the Media Content library is full of videos that have sound, designed for driveExperience:Lobby TV, and videos that do not have sound, designed for driveServices: Digital Menu Board. To help make sure you only add non-audio videos to the Menu program, simply type the word menu into the Filter input line in the Media Content library. You can also sort further by just selecting the Videos button, the Images button, or the Customizable Content button.
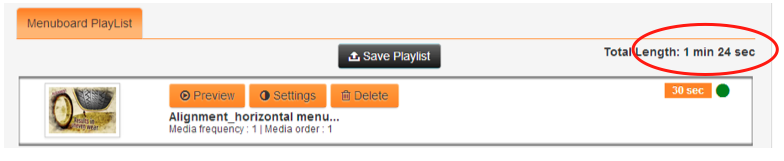
In the example below, we’ve inserted several assets. Notice the Total Length shown in the top right of the Menu playlist area.
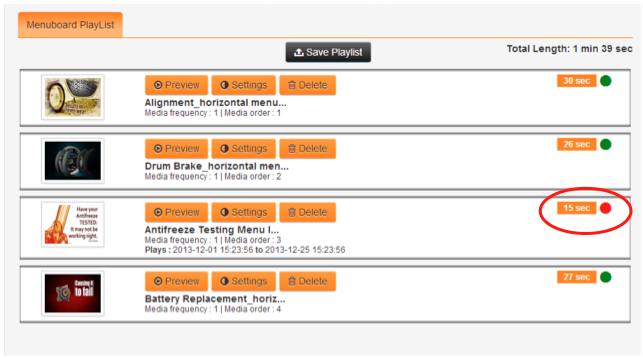
Any time you add or remove items from the program, the Total Length will automatically update so you know how long the entire program loop is. Upon reaching the end of the program, the Menu playlist will loop to the beginning again indefintely.
See the example below. You’ll notice the 3rd item down, a picture, has a red dot to the right – next to its runtime. This instantly tells you that the asset is not currently playing in the program because either the current date is before the start date, or today is past the end date. Any asset that has custom Start and/or End dates will also display those dates on the asset below the asset name.
Editing Customizable Content and Templates
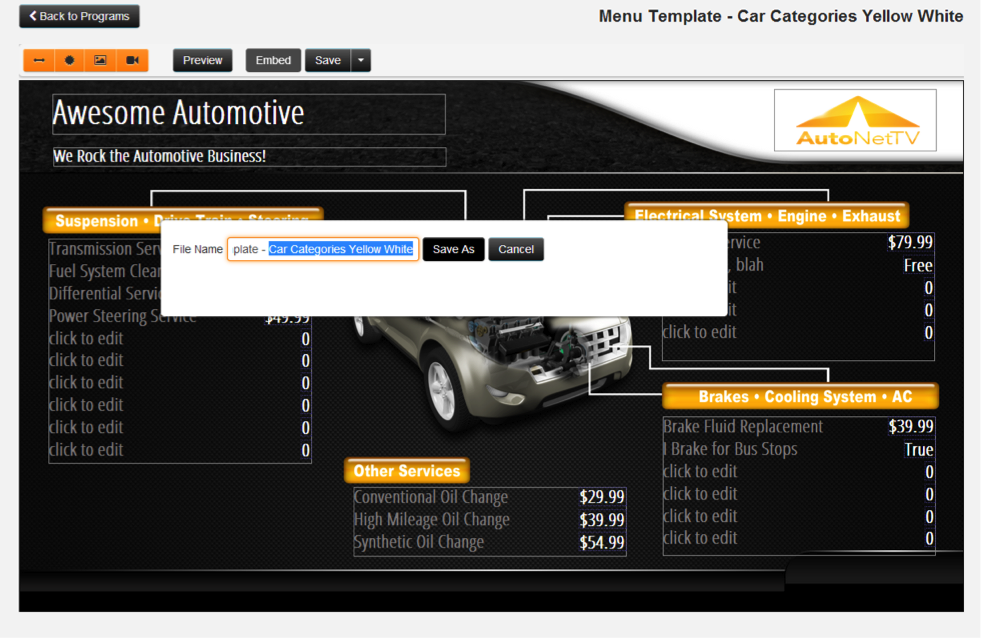
The AutoNetTV Drive system allows you to create your own content and edit existing content templates. To find AutoNetTV created templates, click on the Filter by customizable Content button while in the AutoNetTV content tab. To edit a template, double-click on any item and click Copy.
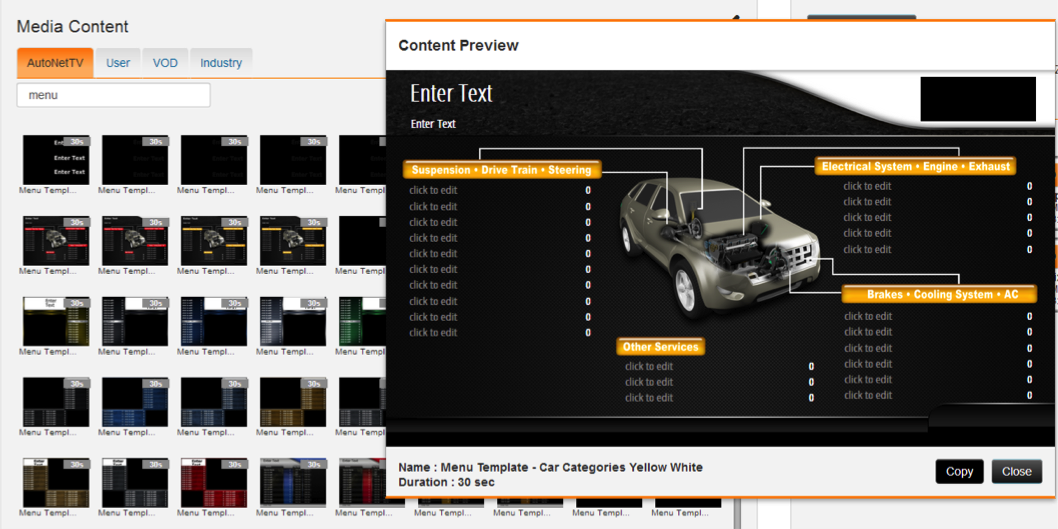
This opens the content editor. For this example, we’ll type text, insert a logo, and customize the menu listings. Then, we’ll save the template – which places it into the User content tab.
Inserting Customizable Content into the Playlist
Find the content from your User library and drag it into the Menu program playlist.
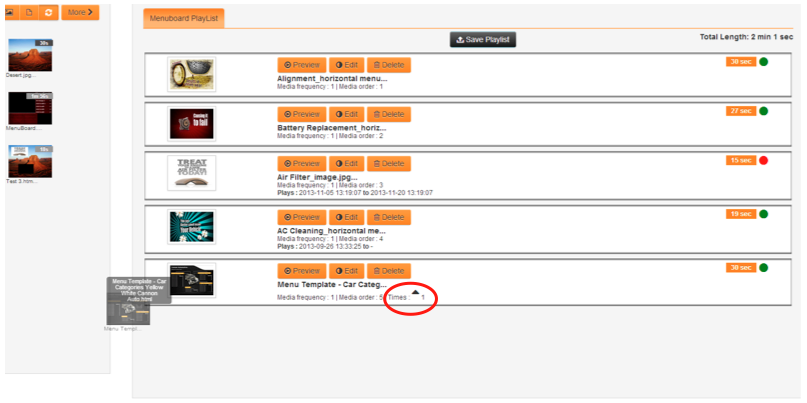
You’ll notice something different with the Customizable content – Times. With any video or image, you can insert the asset as many times as you want throughout the program. You can do that with Customizable content too. And, you can also click the Up or Down arrow next to the word Times inside the asset to choose how many times you want that Customizable asset to loop within the overall playlist loop. In other words, if you click the up arrow to set the Times to 5, that Customizable asset will loop 5 times in the playlist before the program moves on to display the next asset in the program.
As with anything else, click and drag any asset to reorder its position within the playlist. Once you are satisfied with the program changes you have made, click the button at top to Save Playlist. If you have several Menu Board subscriptions within this account, you have the ability to Save to All – meaning these changes will apply to all of your Menu Board devices. After you’ve saved your changes, you can also click the Preview button to sample the program full-screen.
You can insert as many images, videos, Customizable template layouts, or custom content creations as you wish into your Menu Board program.